Monday, January 23, 2012

Totally Turquoise Dresser Makeover

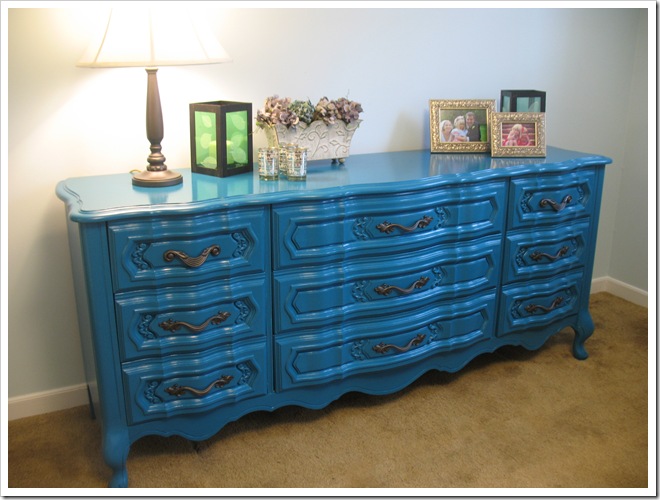
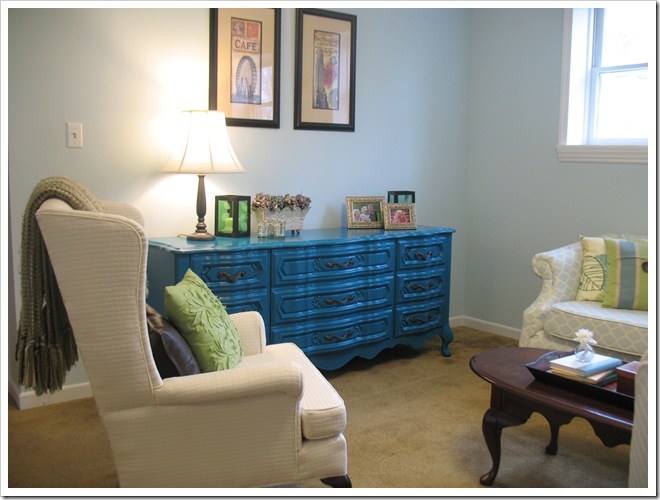
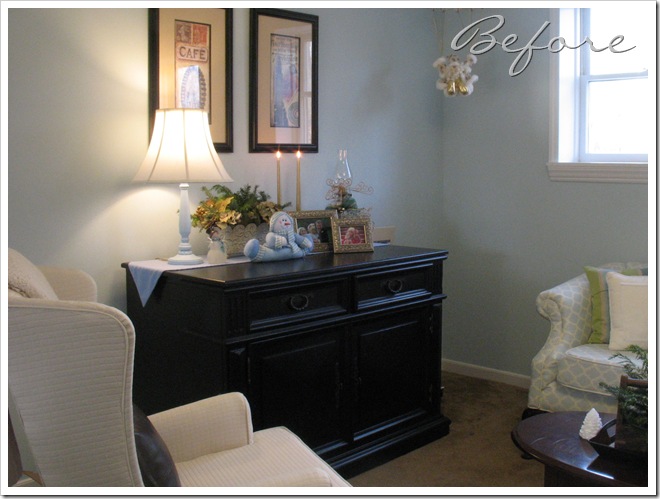
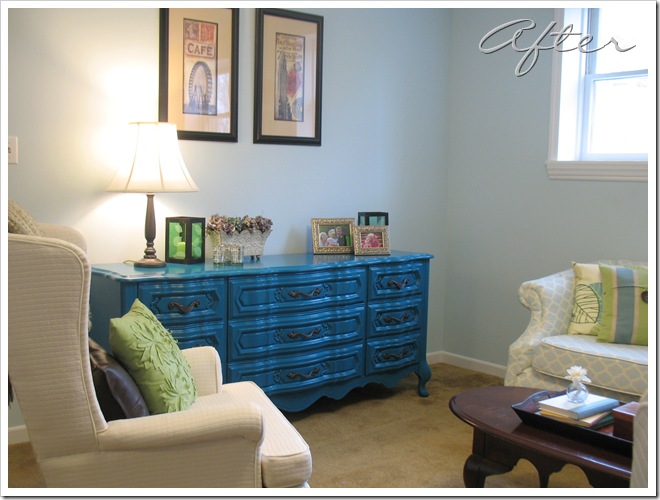
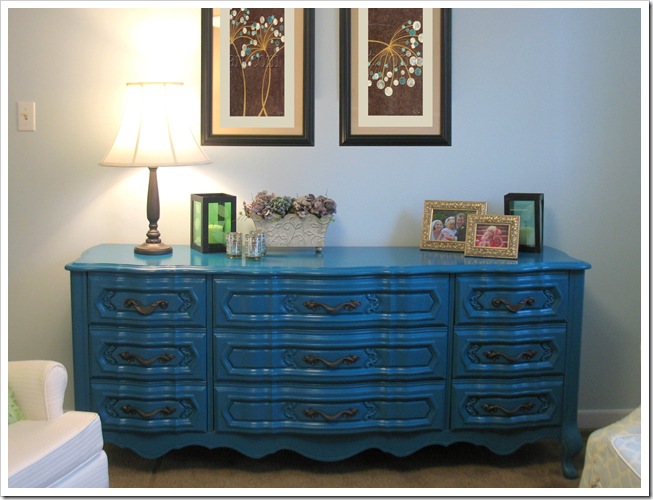
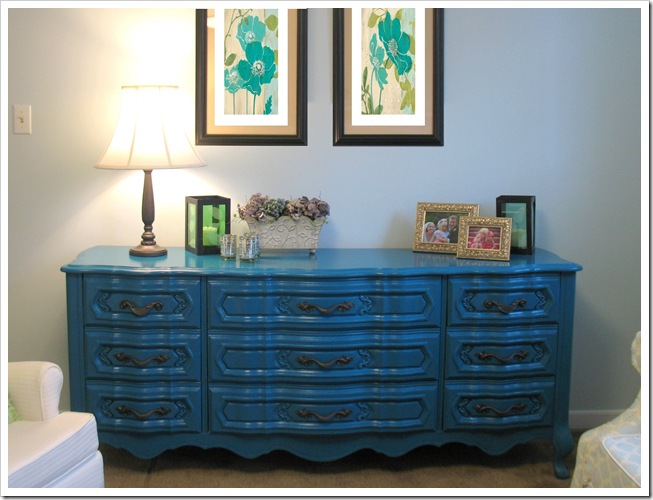
A few days ago I gave you a sneak peek of my new dresser for the den.  I have been wanting to get rid of that huge black cabinet in the den for a while now.  When we moved into this house we were furniture-less and free stuff pretty much made my day.  But it’s been a few years and I have come to realize that the giant black cabinet is not really suitable as a sideboard and is really too big for the space.  Since this realization, I’ve been on the lookout for a wide, but not too deep, dresser or cabinet with lots of storage and character.  Mama found this one for me and score… it’s perfect!  Long and skinny, with curves and character and nine drawers to keep all my crafty junk organized.

IMG_9384

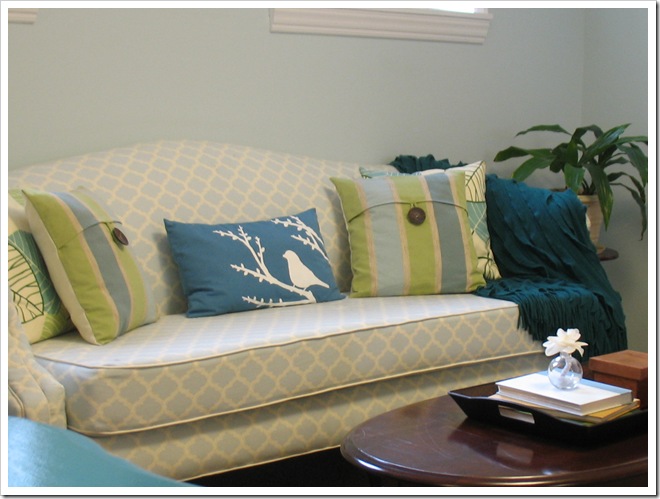
I knew I wanted to paint the dresser some bright, fun color.  Inspiration ultimately came from my bird pillow. 

IMG_9399

I used my tried-and-true method of color selection which involves taking a fabric swatch to the paint store.  I picked a swatch that I thought closely matched the bird-pillow-blue.  It is Olympic’s “Caribbean Splash”.  Just the thing to banish the winter blahs!

I think I must be on a turquoise kick lately… I’ve used it as an accent in the guest room, in the living room, on our totally turquoise garden swing makeover, and now in the den.  I don’t care if turquoise is so 2010 and that this year’s color is supposedly “tangerine tango”.  I’ve never been on time with the trends anyway. :) 

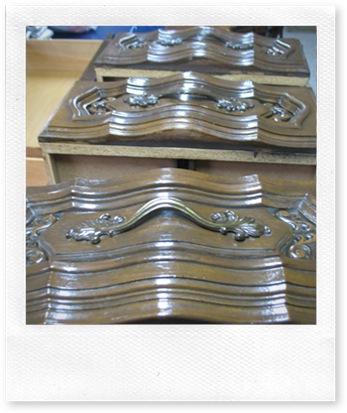
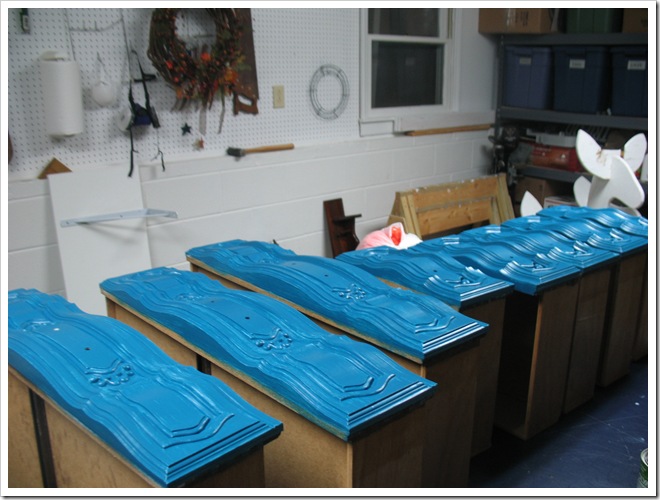
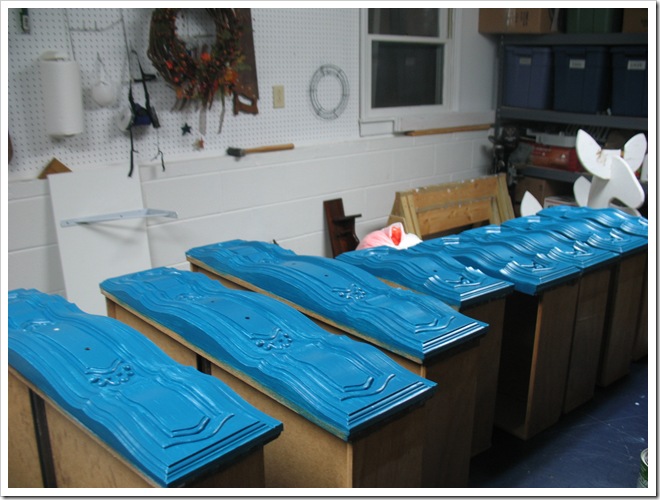
In my haste to get started on the transformation, I forgot to take a before picture of the dresser!  :(  You will just have to imagine what it looked like in a wood tone and sad and neglected-looking.  Here’s what the drawers looked like before I attacked them with a paint brush.

IMG_9222

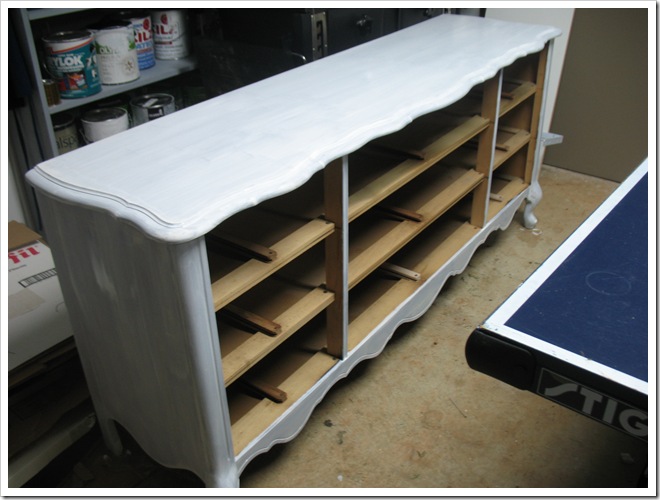
And here is the dresser after the primer step:

IMG_9265

Basically I sanded the flat parts, wiped the whole thing down with soapy water and starting priming.  I used latex primer and semi-gloss latex paint. 

IMG_9267

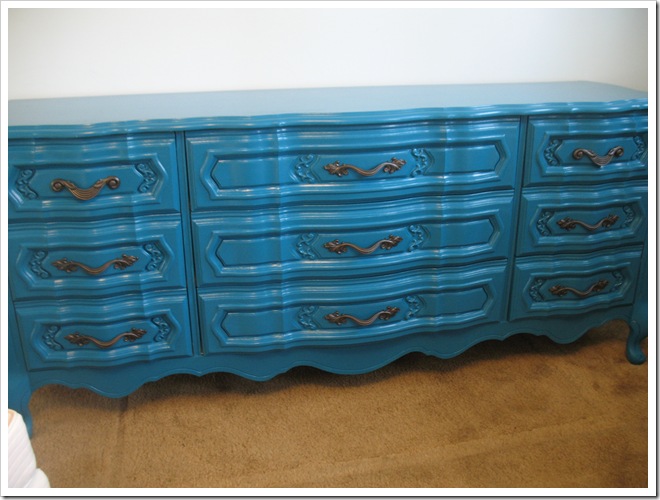
I put two coats on the drawers (that was pretty much torture).  Look at all those little nooks and crannies!  Persistence paid off and it looks great.

I put three coats on the cabinet since it was mostly flat planes of wood and there were more visible brush strokes.  I wish I had let the paint dry a bit longer between coats, because the final coat is a little sticky.  Hopefully it will cure up eventually. :)

Before I could reassemble the dresser I had to go hunting for new hardware.  One of the original pulls was missing and had an ugly bail pull in its place.  This. Will. Not. Do.  So I searched the worldwide web, went to Lowe’s, and went to two Habitat Restores before I found a suitable substitute.  It’s curvy in the right places and actually (miraculously) fit the existing holes.  All the pulls got a fresh coat of spray paint to unify them.  I replaced two of the pulls to make it symmetrical and seemingly-intentional.  Can you spot the new pulls?  They look okay, right?

IMG_9317

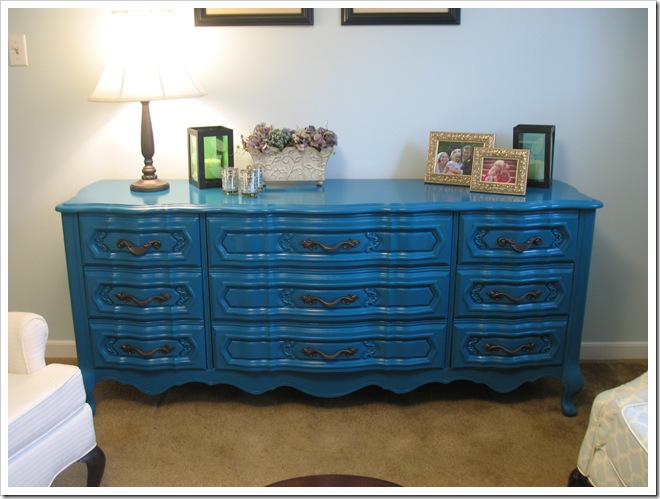
After it was all finished, we (me and four of those miracle mover discs) removed the black cabinet from the den and then Michael helped me put the new one in place.  I stood back to see the results and my eyes bugged out of my head!  Boy, it’s bright!! :)  Then I waited a week or something ridiculous for the top to dry… (it’s still not completely cured for some reason, but I gave up on waiting!  If the finish is scratched up later, I’ll repaint it) before adding accessories on top so I could post this bad boy! (or is it a girl?)

I threw some greenish lanterns up there, a few photos and candles and a box full of dried hydrangeas.  I love how the turquoise brings out the colors in the flowers.  (Wish I had some more white ceramic birds to put on top, but alas…)

IMG_9381

Oh and while I was spray painting the hardware, I slapped a new color on the lamp of requirement to match the new color scheme.  It’s “dark bronze” by Rustoleum.  (Now I think it needs a new shade or some trim?) 

Then I stood back and was satisfied.  See?

IMG_9408

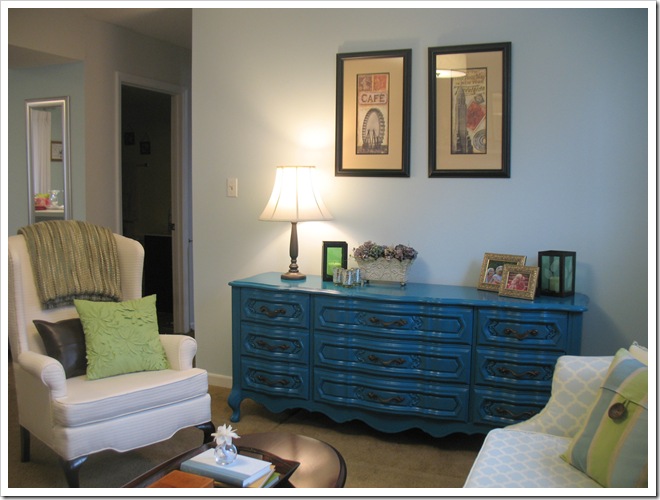
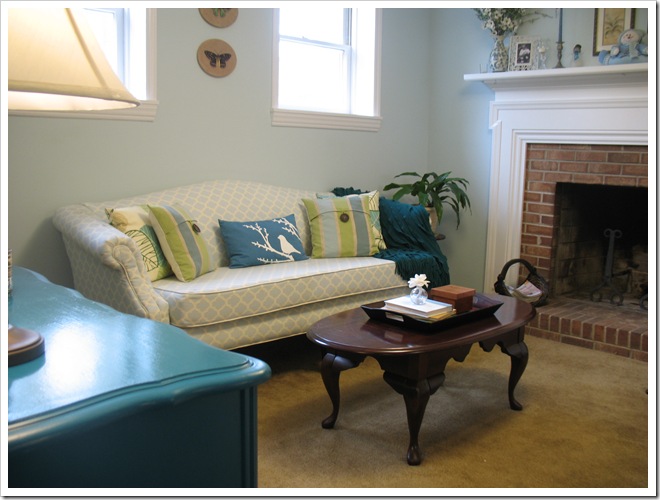
I backed my tripod into a corner to get that shot for you.  Now you can see (if you haven’t already) how the hallway/laundry attaches to the den.  You can also see that there is no room for a person to sit in the cream chairs.  (Pillow obsession?  Check.)  Don’t worry, Bandit still fits. :)

IMG_9373

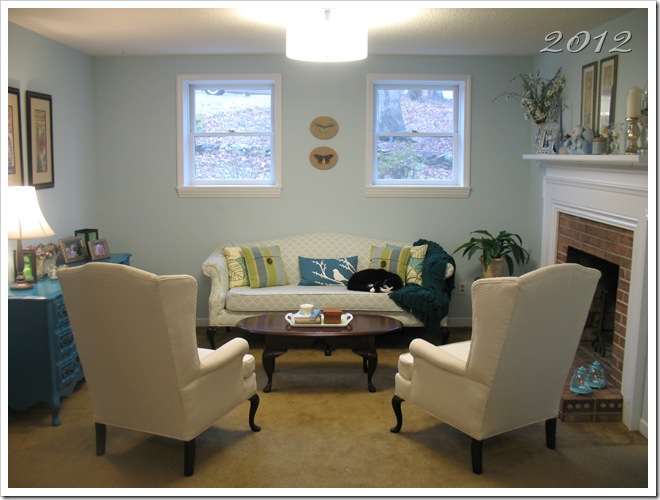
I stole the teal throw from the living room (where it’s been hanging out since I stole it from the guest room).  My poor accessories get no peace… I can’t stop moving them between rooms.  Anyway you can see how the teal throw and turquoise pillow tie into the color scheme with the new dresser. 

IMG_9399

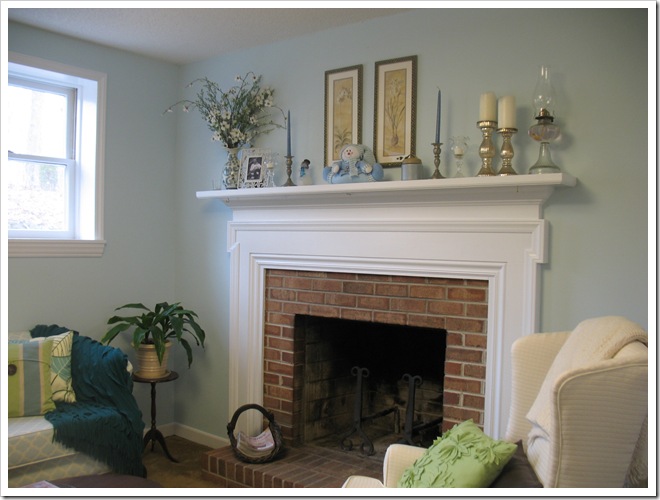
And since we’re here anyway, here is a shot of my winter themed mantelscape.  Snowmen + blue and white = winter.  Very scientific, I know.  I don’t expect it to last very long.  Maybe if it would snow already (I want to try out our new sled!) I could get over winter and move on to my perpetually-early Spring decorating. :)

IMG_9378

So that brings us to the end of our dresser reveal.  It’s awesome, I love it… here’s why:

IMG_8601

IMG_9373

So much lighter and brighter!

The new dresser is shorter than the giant cabinet was so I need to move the artwork down a bit.  I am planning to replace the landmark prints (these, too, were a freebie from a friend) with something more “natural”.  And I’m going to paint it so it will fit in the existing frames. :)  Someone remind me I said that, okay?  Something like this (see how I moved the art down… like magic!):

IMG_9379 poppies

or do you like this version better?

IMG_9379 bubbles

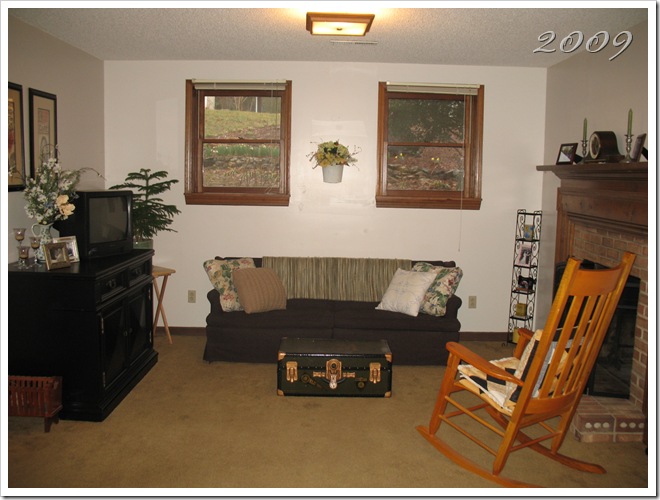
And just because I’m feeling nostalgic and proud (me? proud?) here’s a look back at how far this room has come in the past three years…

IMG_8264 IMG_9412

angel smiley

Thanks for coming along!
signature

Sunday, January 22, 2012

Office Desk: Dream to Reality

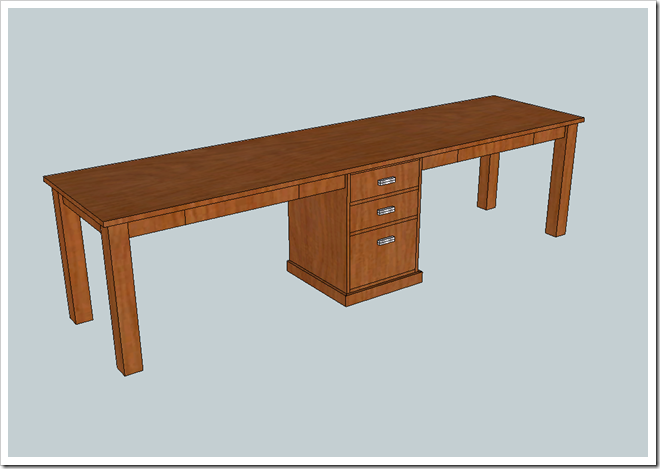
Okay, now you’ve seen the final results of our huge desk project, let’s rewind to the beginning so we can examine the details.  The dream desk all began with a plan (which I showed you here). 

desk 2 iso

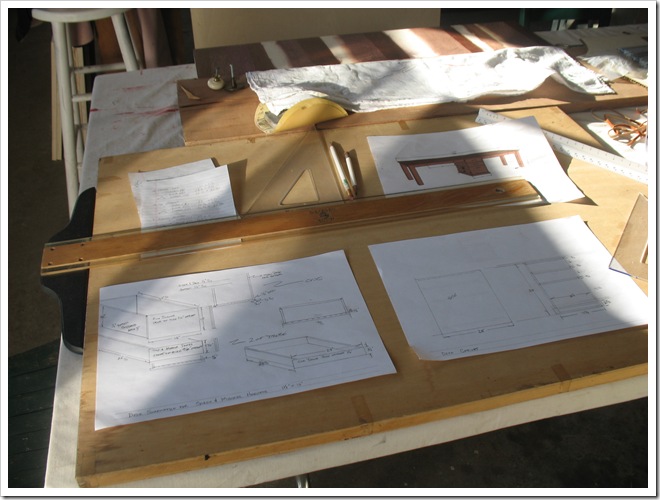
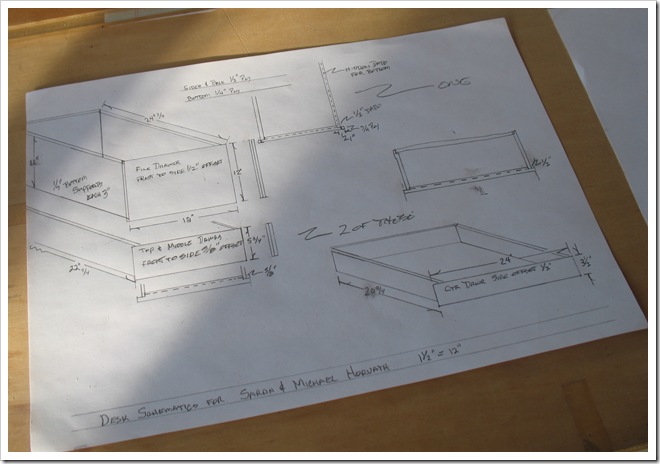
I drew it all by myself in Sketchup and shared it with Papa who helped make it a reality.  We started with a bunch of drawings, a stack of stain-grade birch plywood, and a cut list.  And since I did not print my plans to any known scale, we had to redraw the cabinet and drawers with a T-square and architect’s scale.  Things I know nothing of.  I let Papa do that part. :)  It was pretty, too and very professional-looking.  So, I took pictures.

IMG_9180

Now maybe I will remember how to draw drawers for next time.

IMG_9181

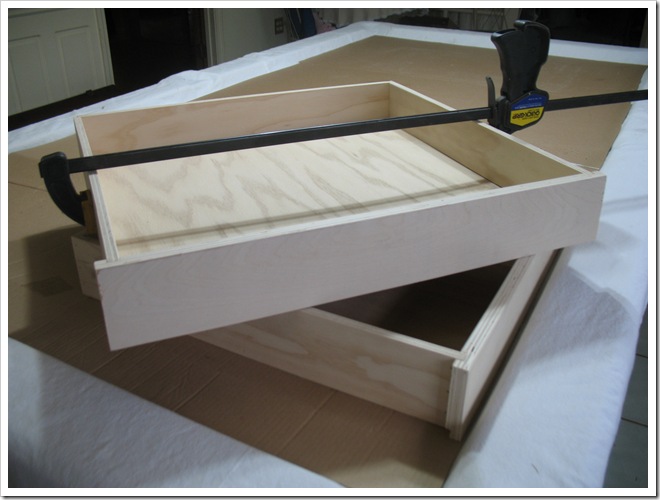
We spent the next two days cutting all the pieces.  The majority of the desk is 3/4” plywood, except for the drawers which have 1/2” sides and back, and 1/4” bottom.  The legs are 3x3’s that we bought pre-fabricated.  They actually measure 2 5/8” (<—irritating).  After we had cut, labeled, and sanded all the pieces (of which there were many), we began building the drawers.  I was responsible for making the cut list and calculating all the dimensions for the drawer pieces.  I was a little worried about my calculations since I’ve never done this before. :)  We put all the pieces together to make sure it would work out before we glued it and lo and behold… they fit!  I was so excited that I hadn’t messed it all up.  I was cheering so loudly that my niece Abby came to see what was the matter! :)  Anyway, the drawers were glued, clamped and nailed together with the air nailer. 

IMG_9187

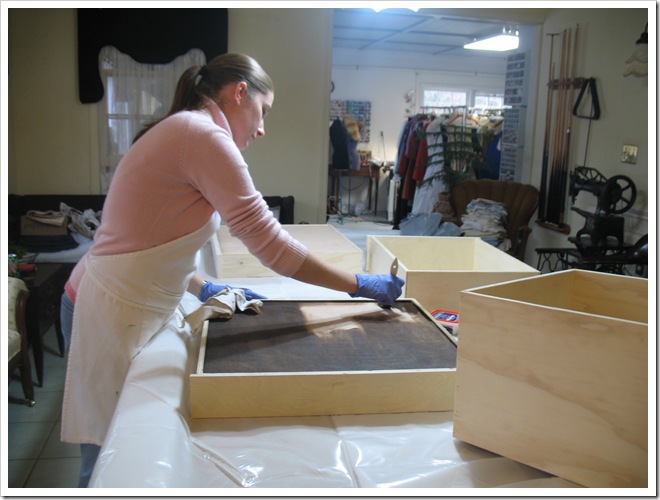
Then we began the process of staining them… on the pool table.  Yes, my parents’ pool table has infinite creative uses other than to play pool.  We use it to cut out fabric, store cake layers, make crafts and now to build and stain furniture!  Luckily we had a roll of plastic sheeting to protect the surface from accidental drips.  :)

IMG_9196

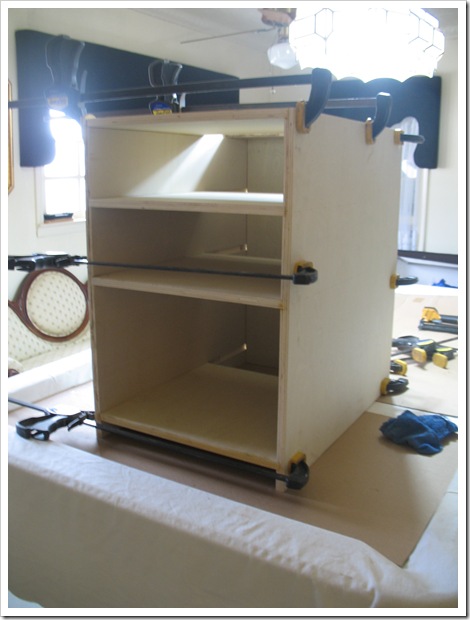
After the drawers were complete we built the center cabinet.  Building furniture is basically like putting together a puzzle… you must get the right pieces in the right slots and then using glue and brute force, bring it all together and make it square before you nail it.  :)  Luckily I have my Papa for that part.  When all else fails, clamp it with like ten clamps and call it a day. :)

IMG_9198

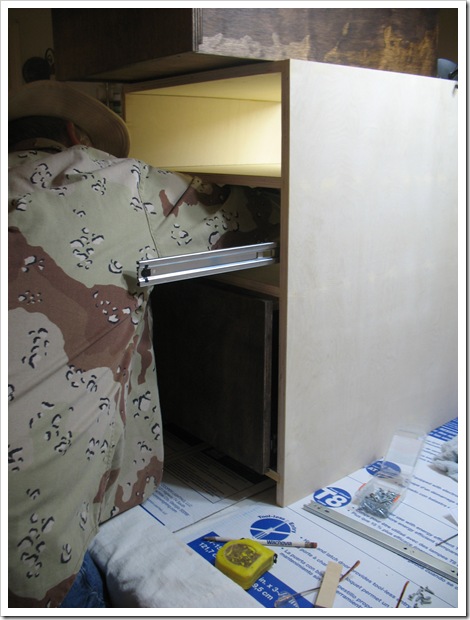
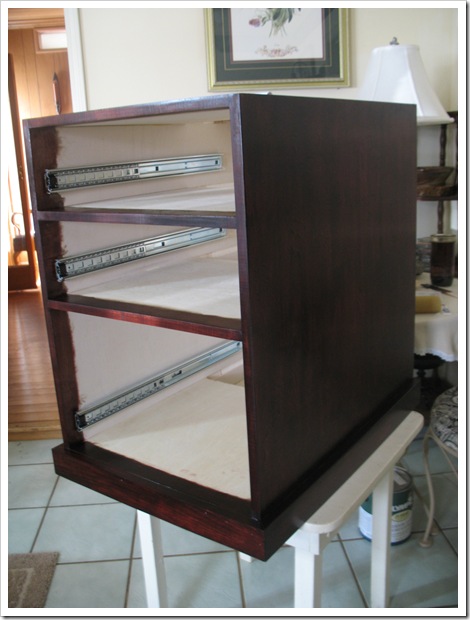
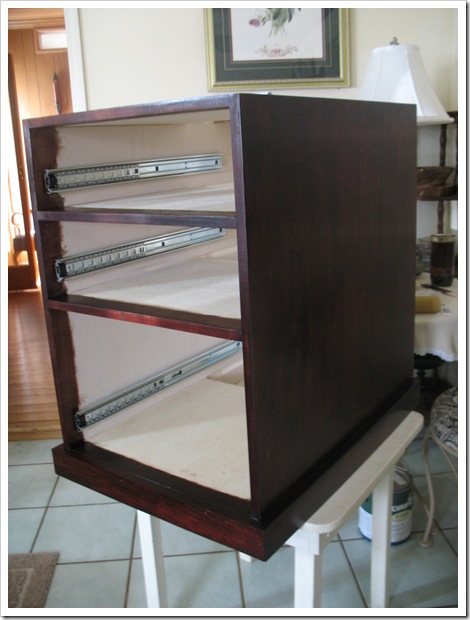
After the cabinet was built, we installed the drawer runners.  This step was easily the most frustrating and most rewarding one of all.  Once again, I let Papa do the hard part.  My job was measuring and drawing lines and holding things in place.  If you see any flaws in this piece, I’m sure they are my fault.  Papa did the best he could to keep me from screwing things up, but he only has two hands. :) 

IMG_9203

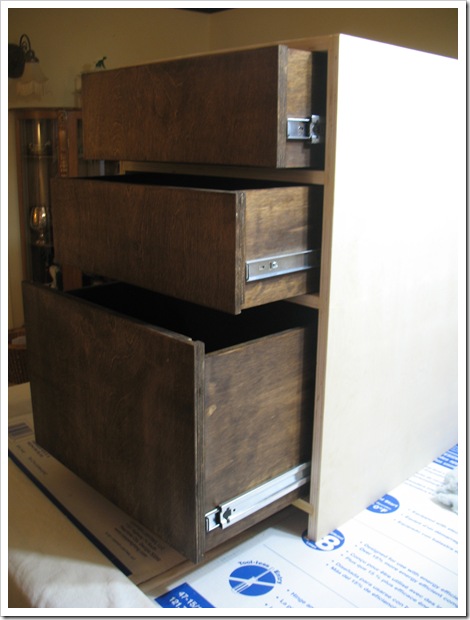
Ta-da!  Drawers that open and close! 

These babies are installed with heavy duty slide mounts that hold up to 100 lbs.  And they have ball bearings that make for a smooth glide and rubber bump stops to keep them from falling open. 

IMG_9208

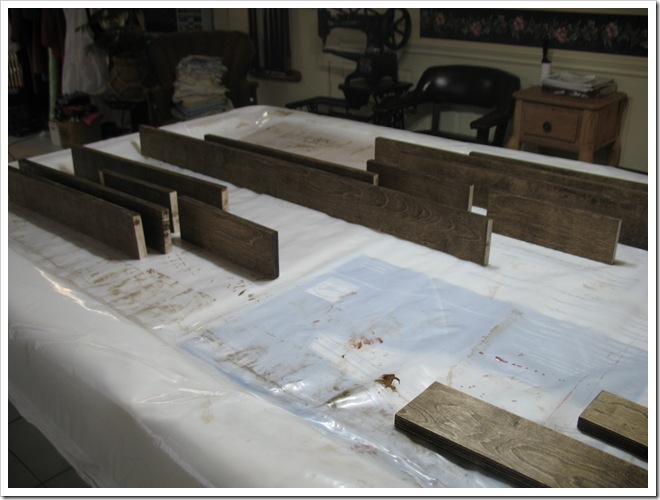
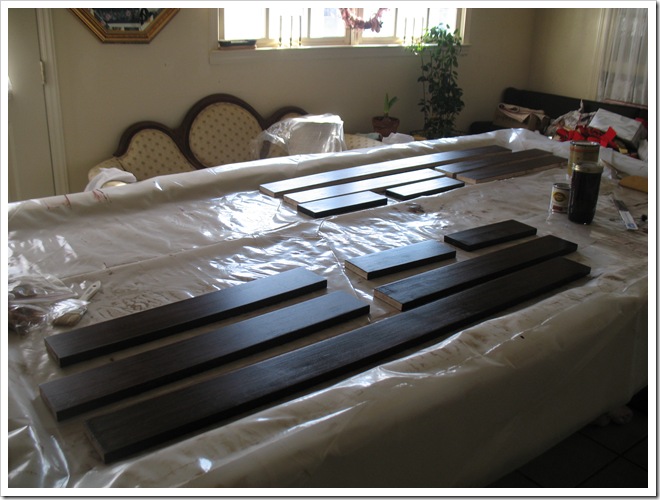
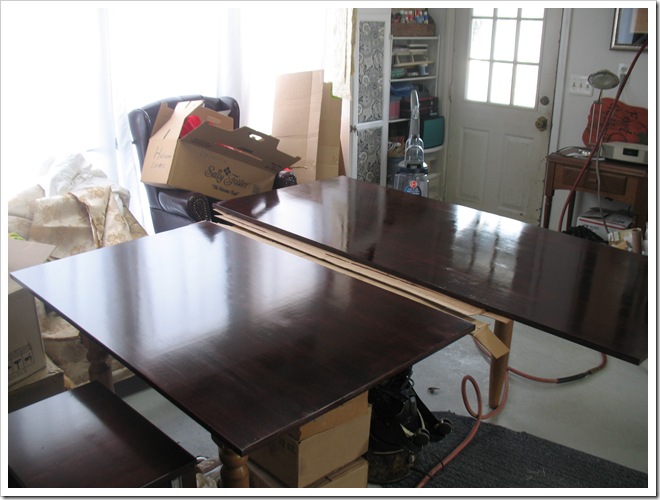
Apron staining came next, since it was easier to completely stain and finish everything before we put it together.  We stained first with dark walnut to bring out the grain, then followed up with two coats of Bombay Mahogany poly-shade to get that rich color I was after, then two final coats of polyurethane to seal it all up.

Stain:

IMG_9220

Poly-shade:

IMG_9260

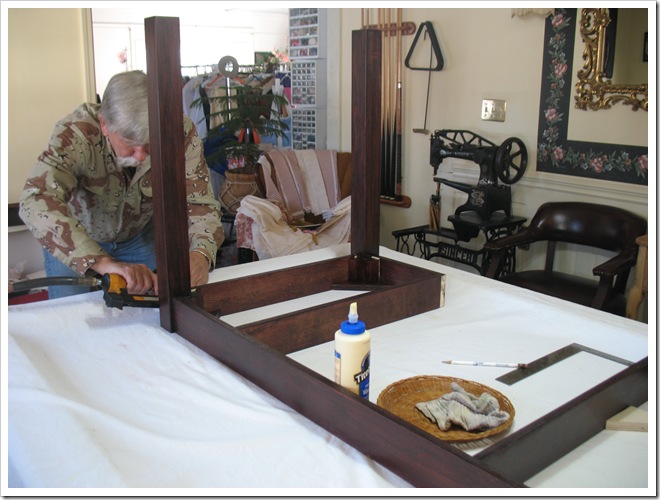
Build puzzle:

IMG_9300

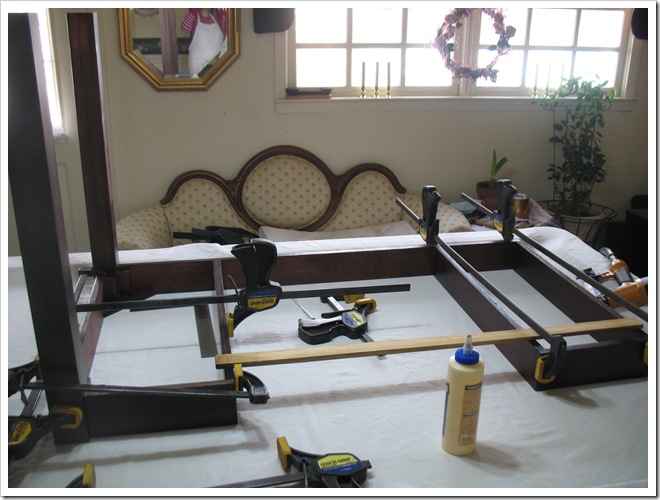
Glue, clamp, check your square, nail in place.

IMG_9305

You know how on Project Runway Tim Gunn is always saying “Make it work!”… well, in the world of woodworking our catch phrase should be “Check your square”.  I bet Papa said that a hundred times.  We did, we checked our square… that desk is more square than the room it’s in. :)

Anyway, after the two apron/leg pieces were constructed, all that was left was to finish the staining before we could put all the pieces together.  Mama did most of the poly-shade and polyurethane application for me while Papa and I built stuff.  The visible plywood edges were sealed with iron-on wood veneer edge banding.  It was super fun to use (at first)… just iron it on, trim it and sand it smooth.  After doing the cabinet front I thought it was super fun. 

IMG_9296

Then we had to do the long straight edges on the tabletops.  That was not so fun.  But it worked out better than any other finishing technique to cover the plywood edge.  Everything was sealed with poly to make it super durable (and hopefully to prevent the veneer from coming un-stuck as time goes by). 

The tabletop for the desk was cut into two pieces because they don’t sell plywood ten feet long.  And also because I wanted this desk to be versatile in case the office ever moves to another room and for when we move to another house.  The way we constructed it, Michael’s side of the desk can be assembled with the cabinet and the large tabletop to make a separate desk.  That leaves me with a smaller tabletop and two legs, no cabinet.  I guess in this situation, I could fasten the other side of the desk to the wall to make a small table.  I had to put the seam somewhere so this plan seemed to make the most sense.  (If we had put the seam exactly in the center, the desk could never be made smaller into one half without there being a large gap on top of the cabinet.)

IMG_9298

Once all the pieces were assembled and stained we had five sections:  2 apron/leg combos (left and right), 2 tabletop pieces (left and right), and 1 cabinet with drawers.  After Mama gave us the green light to transport the now dry pieces to my house, Papa came to install the desk. 

And I forgot to take any pictures of the installation!  Which is a shame, because I wanted you all to see the madness involved in trying to fasten sections together and make them level and square with only four hands and only an inch gap on three sides in which to work.  Madness!

We did it.  It was fun.  And once when I was putting a screw in the drawer slide while Papa held it… he said “Good!”  I think most of the rest of the screws I put it were crooked, or off-center, or over-tightened, which of course I got to hear about each time I did it wrong.  Except for that one.  I hope it was an important one.  :) 

Oh well, practice makes perfect.

IMG_9363

And for all that hard work Michael and I were rewarded with a desk to be proud of!  Now if I can remember to dust the rich shiny finish once in a while, it will keep looking this good!  But for now, I’m just going to go stroke it some more and practice opening and closing the drawers…

signature

Saturday, January 21, 2012

Dream Desk Reveal!

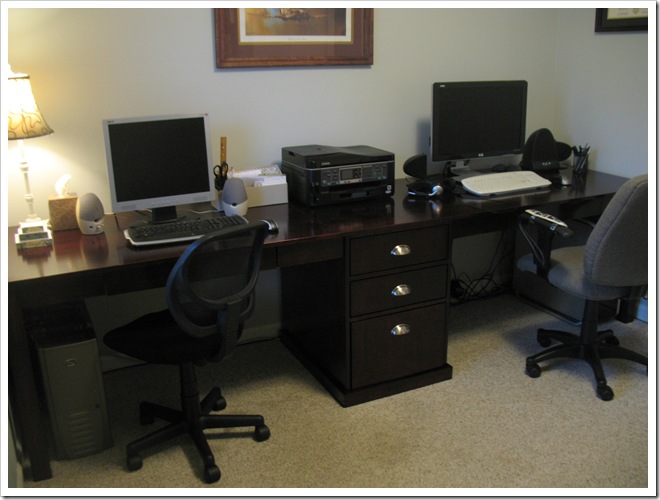
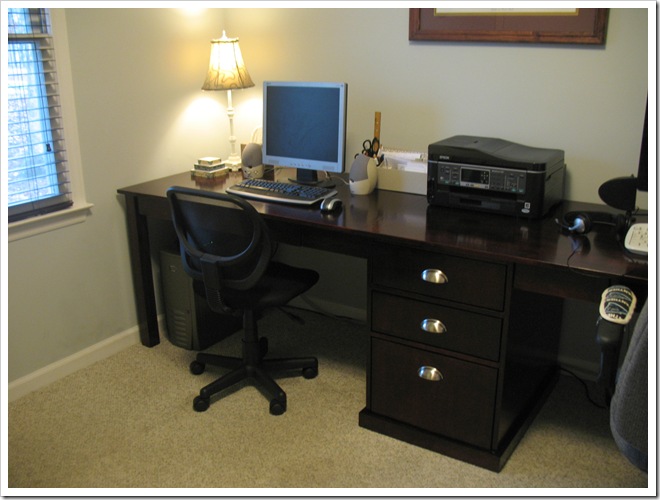
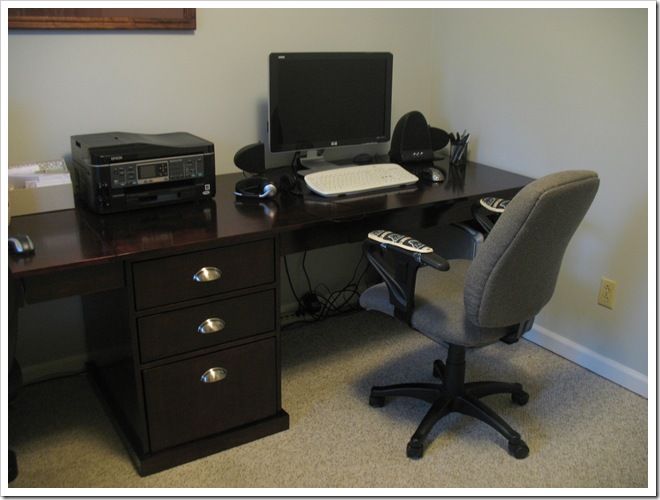
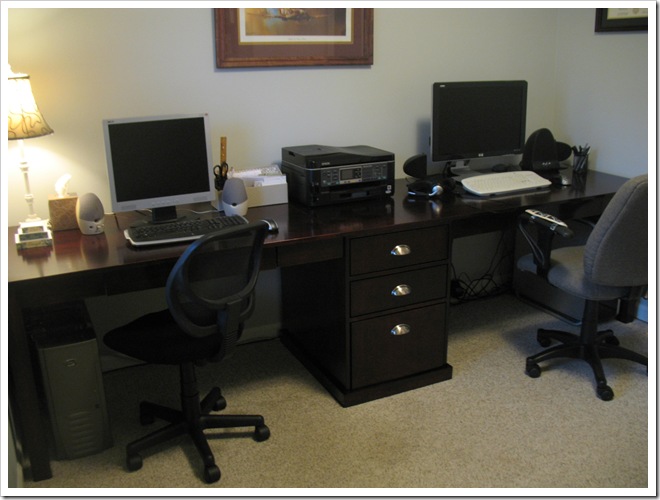
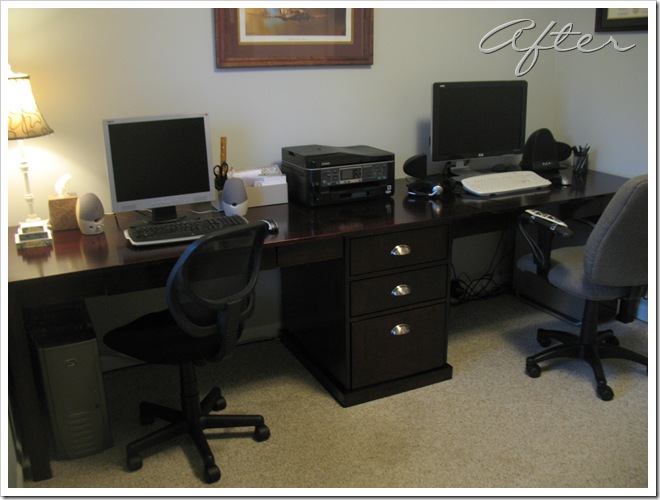
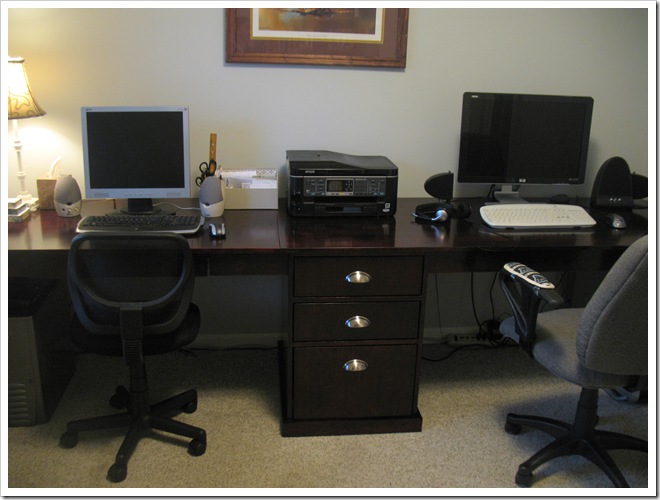
It’s here!  Our fabulous desk was delivered on Friday and we spent a good part of the day installing the last two drawers and putting all the pieces together in the room.  Since our hall is pretty narrow and this desk is pretty huge, we opted to build the desk in five pieces and assemble it on site.  But before I launch into a full elaboration of the what, why, and how, here are the AFTER PICTURES!!

This is my side of the desk:

IMG_9336

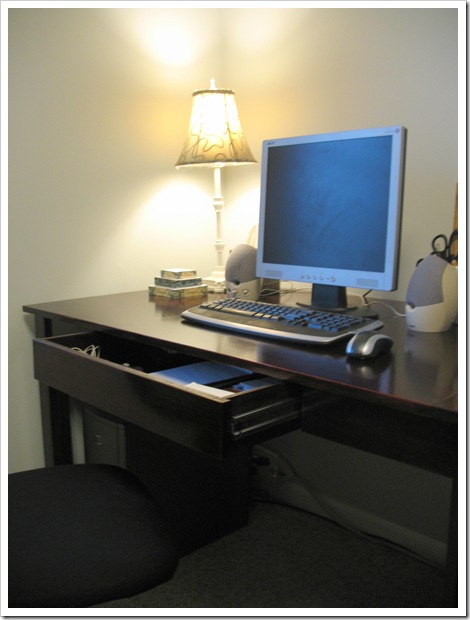
and this is Michael’s:

IMG_9340

Note there is a clear separation so he cannot be shoving his crap over on my side of the desk.  :) 

IMG_9343

I don’t think boundaries will be a problem since we have this huge expanse of space to share.  In fact, it is so deep (30” to be exact) that I can’t even reach the back from my chair.  And I have my monitor pulled forward so I don’t have to squint.  Must be nice having a 24” monitor and perfect vision… Michael.  

IMG_9363

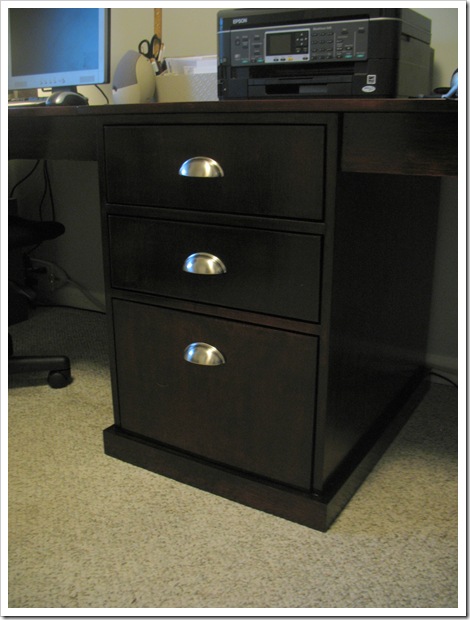
The little cabinet (not little) in the center provides another point of separation, has three storage drawers for us to stash office supplies, and space on top for the fancy printer paper-ejecting robot. :)

IMG_9347

And of course, the three drawers in the middle aren’t the only spot to stash stuff; we each have our own giant drawer in the center of our workspace.  It’s built right into the apron to appear as seamless as possible.  And since it has no drawer pull, I keep forgetting it’s there and looking for stuff in the other drawers instead.  All this time calling it the “invisible” and “secret” drawer has convinced me it’s not real. :) 

IMG_9351

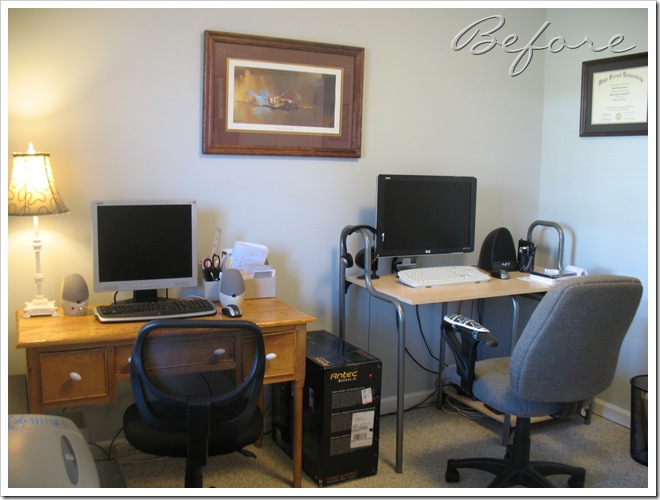
It’s hard to believe this desk which we have dreamed of, fought and argued about, toiled over, cried and bled for is finally finished!  (It’s so epic, I know.  Hey, I can’t help it if we got splinters and they bled.  Plywood is rough.)  It’s finished, and it’s awesome!  And if you don’t believe me yet, just have a look at the before and after transformation:

IMG_8355

IMG_9363

Amazing.

I’ll be back tomorrow to share all the details that got us to this result.  Stay tuned for the full report in which I learn how to design furniture the right way, make a cut list, install drawer runners, “check the square”, and finally put a screw in correctly.  It’s going to blow your mind.  Well, maybe not.  But it’s sure to entertain… see you then.

signature

Thursday, January 19, 2012

Project Sneak Peeks: Desk, Dresser, and Play Kitchen

For the last few weeks I have been mad projecting.  Which may not be the correct way to say I have been building, staining, priming, painting and repainting.  I’m working on three different (wildly so) projects at once and it’s getting a little mad around here (and at Fort Guthrie!).  My garage is starting to have some semblance of order again and I suspect Papa’s is, too… I hope? 

We started construction on our monolith dream desk at the first of the New Year.  Twenty days later and all I have to show for it is a folder full of in process pics!  Delivery of the giant is scheduled for this weekend, pending good weather.  Let’s just say that this reveal is burning a hole in my pocket photo folder!  So while we wait for the “after” photos, I bring you a sneak peek:

IMG_9296

My second project of the year is a secondhand dresser that I am refinishing for the den.  I finally found something to replace the giant black cabinet in there and I decided to paint it… Caribbean Splash!  Which is a glorified way of saying turquoise. :)  It’s bright, it’s blue… it’s taking over one whole wall of the den!  I am waiting for the poly to dry before I can accessorize the top and bring you the full reveal, but here is a glimpse:

IMG_9267

Yes, that’s a glimpse of the reindeer, too… they are in line for a new paint job.   Take a number.

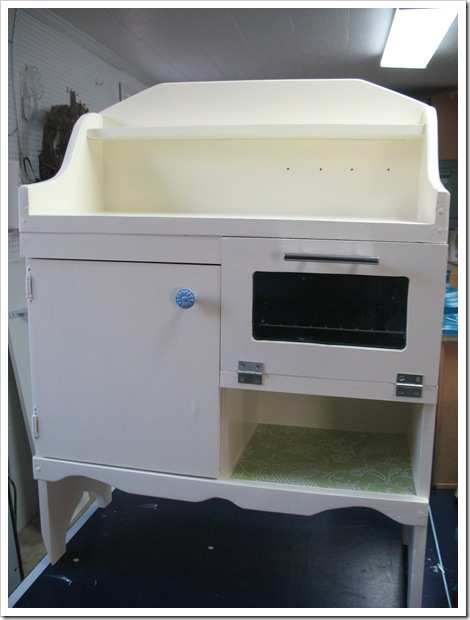
And last but not least, we are practicing multi-tasking this week… while waiting for glue/stain/poly to dry on the desk, we put together a play kitchen for my niece’s birthday!  It’s a small shelf that we retrofitted with doors and cubbies for a make-believe kitchen.  And I’m putting on all the finishing touches, like burners, knobs, hooks and what not.  It’s been a fun process!  I suppose I can give you a peek to tide you over until the big reveal…

IMG_9314

By the way, I love contact paper!  This kitchen is shaping up cuter than my own kitchen… I’m jealous!

Hope you enjoyed this glimpse of what I’ve been up to these past few weeks… working hard to bring you some awesome projects from this Horvath’s life. 

I’ll be back as soon as all the things are dry/installed/accessorized to share the after pics and all the details!

Happy Friday!

signature

Friday, January 13, 2012

New Year, New Centerpiece

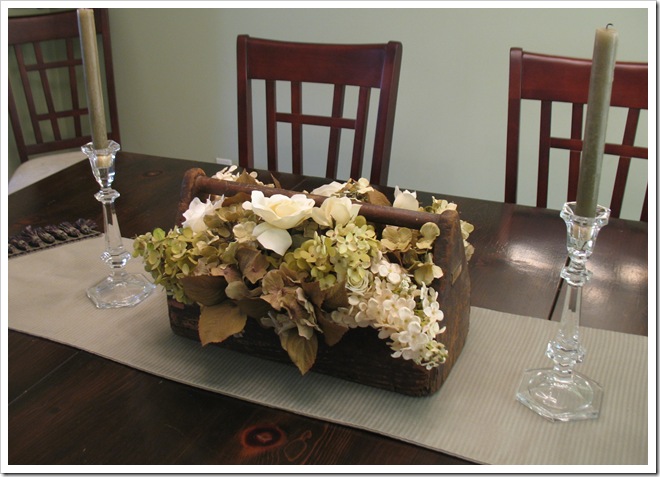
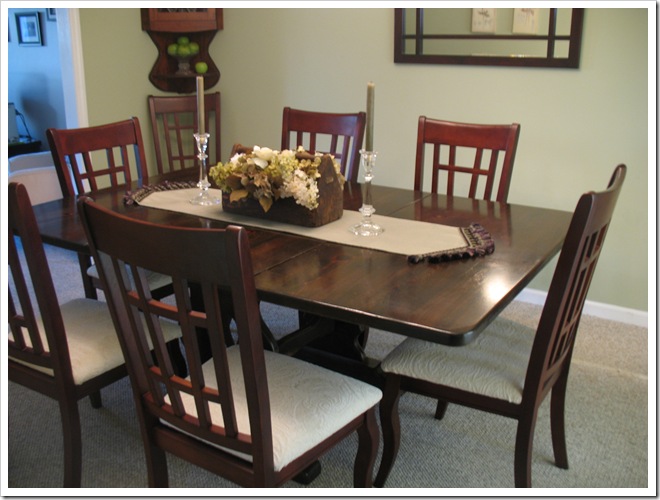
Since all the Christmas decorations have come down, I’ve been rearranging and reaccessorizing all the blank spaces in our home.  First up was the dining room.  I filled my antique toolbox (previously seen here and here) with a bunch of cream and green flowers and set it on the table as our centerpiece.  I’m so happy to have it where I can see it daily.  It wasn’t getting as much face time in the den.  It’s so cute and everyone who sees it loves it! :)  Thanks Mama for sharing your antique find with me! (Don’t worry, she has one, too.)

IMG_9234

The centerpiece is flanked by my fancy crystal candlesticks and a couple of green candles.  I love the juxtaposition of crystal with the aged wood.  It makes me smile… and also makes me wonder if I’m gifted just a little bit? ;)  

IMG_9227

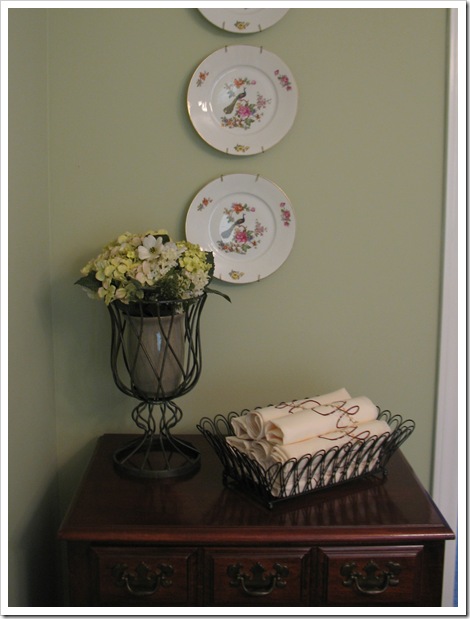
The rest of the room got an update with more green accessories.  The peacock plates went back up over the flatware cabinet.  The top of the cabinet is decorated with some black metal accents in the form of an iron urn with a vase inside and a wire basket (got on clearance!) filled with rolled-up napkins. 

IMG_9244

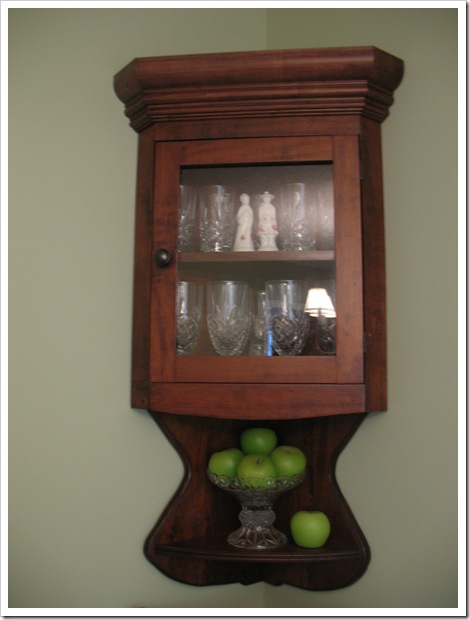
The cabinet across the room was refilled with crystal glasses after our big New Year’s dinner and the lower shelf decorated with a crystal bowl full of green apple candles.  I keep trying to get rid of these silly things, but they are so cute that I can’t part with them.  :) 

IMG_9239

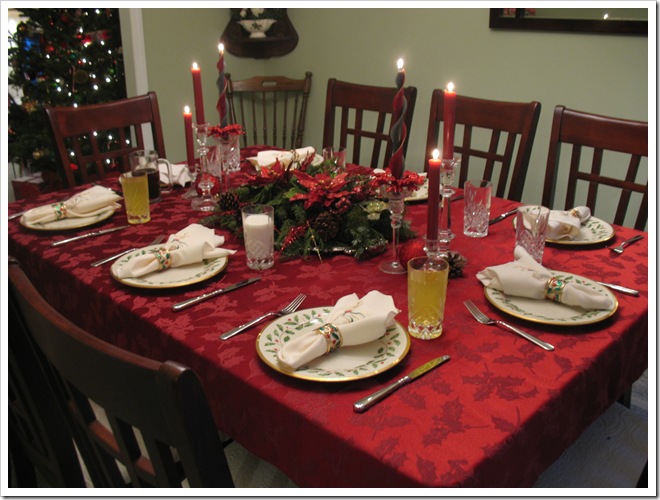
Speaking of New Year’s, here’s a look at the table setting from our dinner party!  I got a new red tablecloth (on after holiday clearance!) for the occasion, and I love it!

IMG_9130

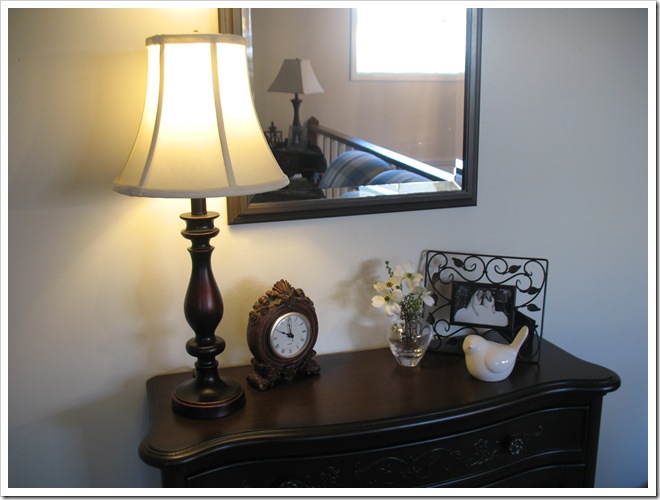
The dining room wasn’t the only room that got a spruce after the holidays… I added some new accessories in the living room, too.  (Truthfully almost all the rooms got updated, but I’m only sharing the good stuff.) ;)  The accent cabinet is now sporting a special addition!

IMG_9247

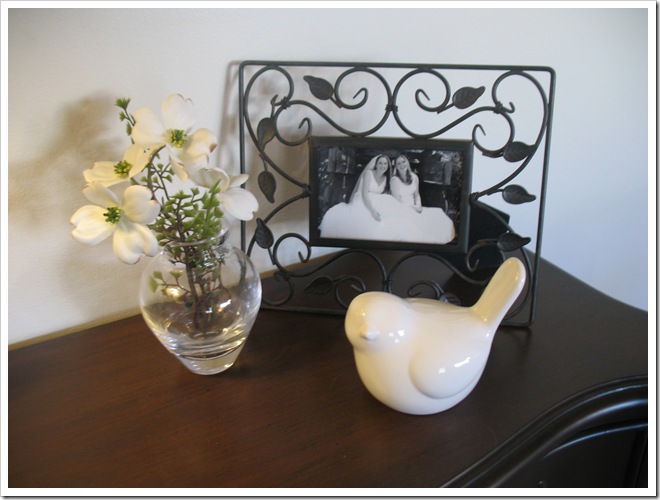
I was at Target after Christmas checking out the holiday clearance and I walked past this darling bird in the Valentine’s section.  After finding some wrapping paper and Christmas cards on clearance, I had to go back to the Valentine’s aisle and snatch up this little guy, too.  I thought he was a deal for only $3!  And you all know how I love birds (and butterflies, lol).

IMG_9252

He makes me smile!  And it doesn’t hurt that he’s hanging out in front of a special photo of me and my sister (posing together in our wedding dresses, in the back of my Mama’s truck).  Double smile!

Hope your new year is off to a great start… I haven’t been exercising like I should, but I have finally trained Riley to walk a loop in our neighborhood each morning!  Hooray!  And we’ve been hard at work on the number 1 project of 2012… our fancy new office desk.  Hopefully it will be finished in a week or so and I’ll be back for the big reveal!
Stay tuned!

signature